
The Ginny Garden Protocol: 5 Steps to Beat Shipping Stress
🌿 Post-Arrival Recovery Guide | 到着後のケアガイド
Your plant has just finished a long journey and is likely experiencing "Shipping Stress"—much like human jet lag. Based on our experience, follow this protocol to help it settle in safely.
長旅を終えた植物は、人間でいう「時差ぼけ」のような状態(輸送ストレス)にあります。私たちの経験に基づき、以下のステップで新しい環境に慣らしてあげてください。
👀 A gentle reminder on observation | 大切なお知らせ
Plants are living organisms, and no two are exactly alike. How they respond will depend on their unique stage of life and your specific home environment. While this protocol is based on our years of experience, it is a guide rather than a strict rulebook. We encourage you to observe your plant closely and adjust these steps as needed.
植物は生き物であり、それぞれの成長段階やご自宅の環境によって状態は異なります。このガイドは私たちの経験に基づいたものですが、決して絶対的なルールではありません。日々の変化をよく観察し、植物の様子に合わせて柔軟にケアを調整してあげてください。
🍂 What to expect from a tired plant | 到着時の植物の状態について
Spending days inside a dark box with fluctuating temperatures naturally disrupts a plant's cycle. When unboxing, it is completely normal to see minor wilting, slight yellowing on older leaves, or temporary root stress due to low humidity. Do not panic—this is simply what a tired plant looks like. The steps below are designed to rehydrate the roots and safely transition the plant back to its natural, vibrant state.
暗い箱の中で温度変化にさらされながら数日間過ごすことは、植物のサイクルを一時的に乱します。そのため、箱を開けた時に軽いしおれや、古い葉の黄変、湿度の低下による一時的な根のストレスが見られることがありますが、これはごく普通のことです。決して焦らないでください。これは単に植物が「疲れている」だけのサインです。以下のステップは、根に水分を補給し、安全かつ確実に本来の元気な姿へ戻すために作られています。
🔍 Phase 1: Inspection & First Aid | 状態の確認と手入れ
Give your plant a quick check-up. If the leaf texture has become mushy, or if you find soft roots, trim them away immediately with clean shears ✂️ to prevent spreading.
まずは全体の確認を。葉の質感が水っぽく溶けたような「ジュレ」状になっていたり、根腐れがある場合は、傷みが広がるのを防ぐため、すぐに清潔なハサミ ✂️ で切り取ってください。
💧 Phase 2: Hydration & Potting | 水分補給と植え付け
Place the plant in clean water 🚰 for a few hours to rehydrate. Once refreshed, pot it in your preferred growing medium 🪴.
植え付けの前に、数時間ほど水 🚰 に浸けて水分を補給させます。その後、お好みの用土 🪴 に植え替えてください。
🧖♂️ Phase 3: The Humidity "Spa" | 湿度管理と回復(スパ)
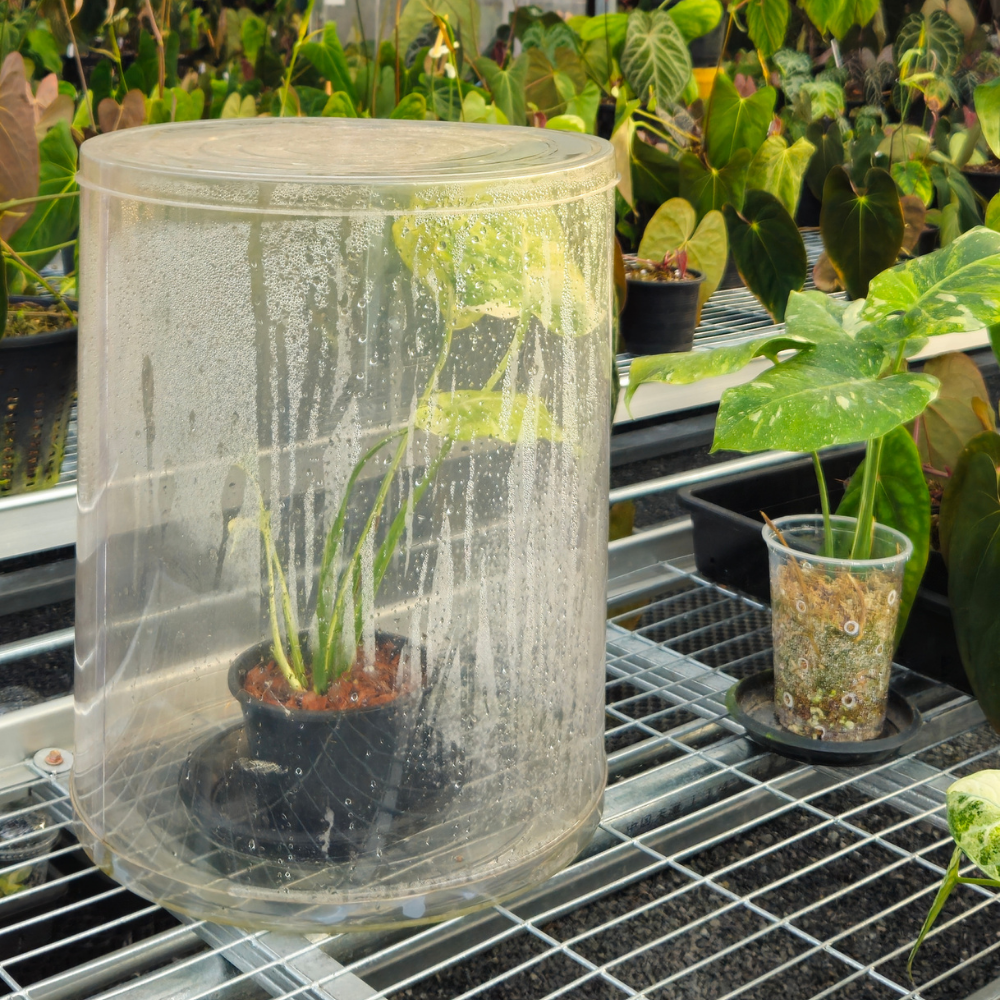
After watering, create a personal mini-greenhouse for your plant. Whether you use a transparent container, a glass cloche, or a simple clear plastic bag, the goal is to trap the moisture. This creates a soft, high-humidity "recovery room" that wraps your plant in a gentle tropical climate, allowing the leaves to comfortably rehydrate and rest after their long flight.
水やり後、植物のための「小さな温室」を作ってあげましょう。透明な容器でも、ガラスドームでも、あるいはシンプルな透明のビニール袋でも構いません。大切なのは湿度を閉じ込めることです。このふんわりとした高湿度の空間が、心地よい「リカバリールーム」となり、長旅で疲れた植物を優しい熱帯の気候で包み込み、ゆっくりと休ませてくれます。
🌡️ Phase 4: Acclimation (The 3-Day Rule) | 環境への順応(3日間のルール)
From our experience, a 3-day recovery period is sufficient. Keep the container in a bright, indirect sun space, ensuring the temperature does not exceed 27°C (80°F) 🌡️. While the high humidity is crucial right now, leaving it sealed for a long period of time can invite fungus—please monitor closely.
私たちの経験では、3日間の回復期間で十分です。直射日光の当たらない明るい場所に置き、容器内の温度が 27℃ 🌡️ を超えないように管理してください。高湿度は回復に不可欠ですが、長期間密閉したままにするとカビの原因になるため、こまめに様子を観察してください。
☀️ Phase 5: Transitioning to Normal Care | 通常管理への移行
After 3 days, it is time to remove the plant from its spa. Find a bright, comforting spot with indirect light, completely avoiding harsh direct sun 🚫☀️. It is now ready to thrive in your collection!
3日経ったら、いよいよ植物を容器から出すタイミングです。強い直射日光は完全に避け、間接光の入る明るく心地よい場所を見つけてあげてください 🚫☀️。これで、あなたのコレクションの一員として元気に育つ準備が整いました!
